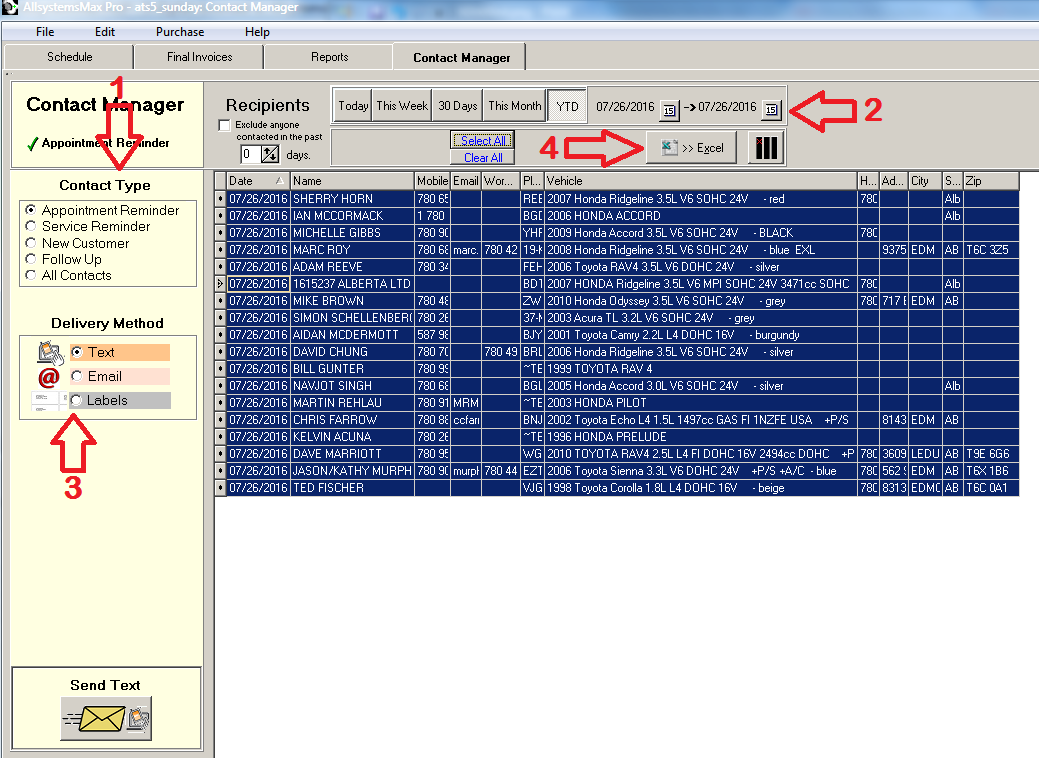
1. Begin by selecting Contact type in the upper lefthand panel.
2. Select appropriate dates. In the example shown, a single day of appointments is selected so that customers can be reminded on the day before they are scheduled. You can also select a wider date range and then highlight only the appropriate records.
So, you either use the Select All button, or click on a single recipient. Hold the Control key down and continue clicking to select more lines. Or, hold the Shift key down and click the beginning of a sequence of lines, followed by a click at the end of the sequence.
3. Semi-automated delivery of customer correspondence from the Contact Manager is by email, and optionally by text. With the Texting module installed, you can text appointment reminder, service reminder and other targeted messages. In addition, you can also send a general text message to a selected customer from the Schedule tab or Orders tab by first opening the gear icon (tools).
4. Often, you may simply want to view the list of recipients, but if you have a compatible spreadsheet program installed, the list can also be saved to an Excel spreadsheet by clicking the Excel button. The spreadsheet will be loaded and shown on screen. It is also saved in the File menu -> Saved Spreadsheets.
The other Contact type methods are handled similarly to the only shown below by repeating steps 1-4.