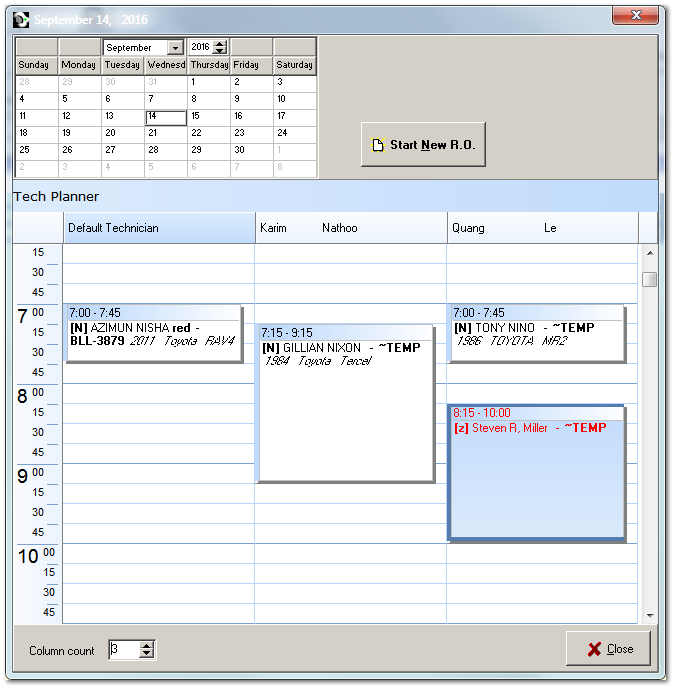
The Tech Planner is a visual representation of the Schedule. It is similar to Google Calendar but fully integrated with estimate and repair order information you have already entered.
Two ways to bring up the Tech Planner window:
1. In the Schedule tab, double click any date in the upper lefthand corner to bring up the Tech Planner window.
2. In the Repair Order tab, click the TP button found to the right of the Vehicle and History buttons near the top of the screen.
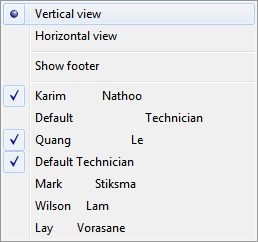
The Tech Planner settings can be changed by right clicking the empty blue square in the top left corner of the planner grid, near the 6:00am time slot.
To start a new RO within the planner, instead of in the Schedule tab:
1. Use your mouse to drag across the desired time slot in the desired technician column or row.
2. With the slot highlighted, click the Start New RO button at the top of the Tech Planner window.
3. Follow the remaining prompts for selecting customer and vehicle.
4. In this way your new repair order is not only created but also scheduled in both the Tech Planner and Schedule tab.
To reassign a repair order to a different technician within the planner simply drag and drop it where you want it.
To change the time allocated to a scheduled repair order, grab the outside borders and move them in the desired direction. The size will grow or shrink.
To keep the allocated time but move the entire repair order to another starting time, left click and then drag the uppermost part of the square (where the start and end time is displayed) to a new start time.